Pictures : Maple stairs & maple railing with floating landing system. Finishing Touches
- 7 stair images for this home

The maple stairs and hand rail in this home contain a plethora of informative illustrative material. First, they span 3 floors with no walls supporting the interior structure of the stairwell. Each floor contains 3 flights of maple stairs turning 180 degrees to reach the next floor. Between each flight is a landing. This is similar in concept to the concrete stairwells one sees in office buildings where you can look over the railing down the center all the way to the ground floor. The maple stairs are all C1S stringer configurations except for a set leading off to a side room which illustrates and H2S stringer configuration between two walls perfectly. The railing shows off the effective use of goosenecks to add style to this newel post to newel post railing system as well as illustrates stair to landing transitions.

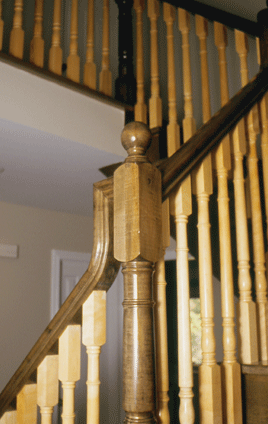
#4 railing style with standard #1 baluster - image Id maple8-1 -Finishing Touches -(stairs and railings images)
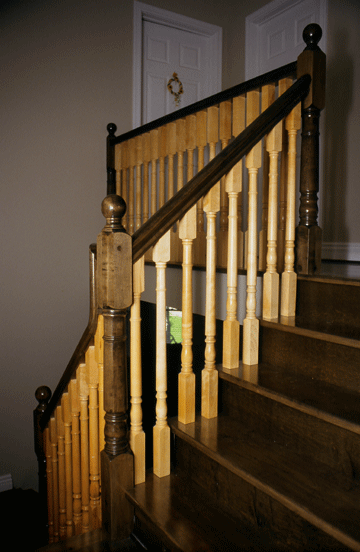
#4 railing profile in maple 3 1/2 inch turned Standard #1 ball newel newel post in maple 1 3/4 inch Standard #1 Baluster in natural maple - if your browser supports the feature run your mouse around the image and important details will become visible about the item This picture is of our #4 railing style in maple, with an 1 3/4"standard #1 turned style baluster in maple. Newel post is a 3 1/2" turned Standard #1 style to match the baluster. The Stair is a 2 1/4" maple stringer with an 1 1/8" maple tread and a 1/2" maple faced particle board riser. It is a Cut one side (C1S) closed rise stair for an unsupported site application.

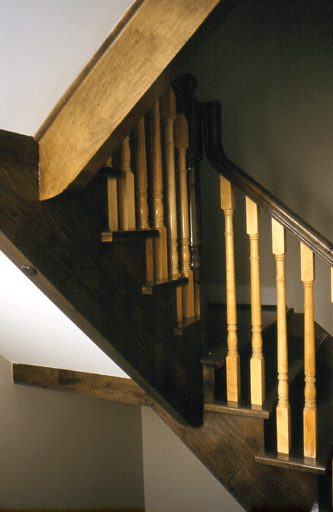
Design note: This picture shows two landing to stair transitions with a half newel post at the far end of the landing rail. What is important to note about this picture is the difference in the way the railing enters and exits the newel post square at the top of the stair and the newel post just below it. The newel post at the top of the stair has no gooseneck, the railing enters in to the square of the post lower then the railing exiting on the other side to form the run across the landing. Look at the next newel post below the post at the top of the stair, you can see that the railing swoops up to the height of the railing exiting on the other side going toward the upper newel post. It is a gooseneck that is responsible for adding the visual swoop and allowing the railing to enter and exit at the same height on the square of the newel post.  This illustrates two different way's to tackle the stair to landing height transition difference.

Image id: maple8-1
Railing: #4
Balusters: turned 1 3/4" Standard #1
Newel Posts: turned 3 1/2" Standard#1
Stairs: Straight C1S closed rise in maple 1 1/8" tread, 2 1/4" stringer 
@ Finishing Touches - www.ftstairs.com

Back


#4 railing style with standard #1 baluster - image Id maple8-2 - Finishing Touches -(stairs and railings images)
This image shows the use of goosenecks. The newel post in the center of the image illustrates how a gooseneck is used to get the railing to rise up but not travel any distance putting it at the level of the railing exiting on the other side of the same post starting the next run of railing. The newel post is sitting on the landing putting the top square of the newel post inline for the next run of railing to start out from it, however that leaves the railing coming in from the run below at the old stair level. If you were to project the railing straight into the newel post you would see that it would terminate at the bottom portion of the square. It is the gooseneck that catches the end of that run of railing and raises it up to meet the next run leaving the newel post. A gooseneck give a railing rise without causing it to travel. The newel post square also provides the rise if you chose not to use the gooseneck however goosenecks and an interesting visual element to a run of railing. Because this is a newel post to newel post system the gooseneck could have been omitted but then the effect is lost.
Image id: Maple8-2
Railing: #4
Balusters: turned 1 3/4" Standard #1
Newl Posts: turned 3 1/2" Standard#1
Stairs: Straight C1S closed rise in maple 1 1/8" tread, 2 1/4" stringer 
@ Finishing Touches - www.ftstairs.com

Back


Self supporting landing system - plan view - image Id maple8-3 - Finishing Touches -(stairs and railings images)
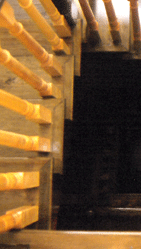
Self supporting landing Gooseneck Center of the stairwell showing from the top landing down to basement floor with no inner support walls Self supporting landing Center of the stairwell showing from the top landing down to basement floor with no inner support walls
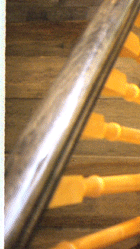
This image shows a plan view of the entire stair system notice how you can see all the railings from top to bottom. There are 2 intermittent landings between the floor levels that are self supporting. This image also show the use of goosenecks in succession. The illustration of the C1S stringer configuration is accentuated showing the top view of the treads with returns, notice the miters in the front right corner of the steps. Also note the way the edge of the tread goes back behind the one above it,  and how the balusters sit down on the surface of each step. The returns add a polished look to the tread edge instead of showing the end growth of the wood if no return were present which may be desirable in a more rustic setting. 

- if your browser supports the feature run your mouse around the image and important details will become visible about the item

Image id: maple8-3
Railing: #4
Balusters: turned 1 3/4" Standard #1
Posts: turned 3 1/2" Standard#1
Stairs: Straight C1S closed rise in maple 1 1/8" tread, 2 1/4" stringer 
@ Finishing Touches - www.ftstairs.com

Back


#4 railing style with standard #1 baluster - image Id maple8-4 - Finishing Touches -(stairs and railings images)
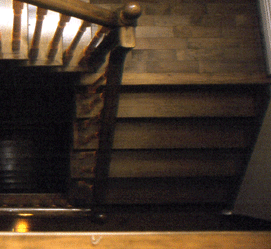
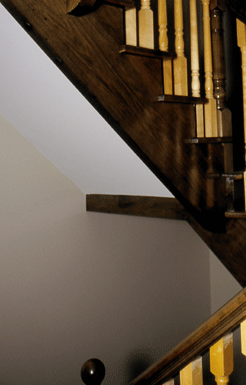
This image shows the support structure of a floating landing system. It is the way the stringers are manufactured to tie the landing into the stringer that forms the support for the stair below. You can see how the stringer in the bottom right is carried across to the wall on the left. This provides the framework for the landing top side and the support for the stair below and the stair above. The process is duplicated in the upper left corner of the image. The inside stringers are considerably  larger and in some instances greater then 2 1/4" thick solid hard wood.  Also illustrated are the side and underside views of the tread returns, notice how they overhang each step and give a cut away appearance of the steps.  The newel post in the fore front shows a non-goose necked stair to landing transition.

 - if your browser supports the feature run your mouse around the image and important details will become visible about the item

Image id: maple8-4
Railings: #4 handrail
Balusters:  1 3/4" Standard #1 turning
Newel Posts: 3 1/2" Standard#1 turned
Stairs: Straight C1S closed rise in maple 1 1/8" tread, 2 1/4" stringer 
@ Finishing Touches - www.ftstairs.com

Back


#4 railing style with standard #1 baluster - image Id maple8-5 - Finishing Touches -(stairs and railings images)
The view in this image shows all three staircase mostly from the side and back illustrating the floating landing and self supporting stringer configurations from an internal perspective.  Lower right is the first stair case leading off the main floor terminating at the landing mid page. The center shows the mid staircase having come off the first landing at 90 degrees and terminating at the landing above. The upper left shows after turning 90 degrees once more the underside of the inside stringer and drywall on the third stair in the series terminating on the second floor header which is not quite visible at the top of the image . This also shows another view of the tread and return overhang on the the C1S stringer mid picture.

- if your browser supports the feature run your mouse around the image and important details will become visible about the item

Image id: maple8-5
Railing: #4
Balusters: turned 1 3/4" Standard #1
Posts: turned 3 1/2" Standard#1
Stairs: Straight C1S closed rise in maple 1 1/8" tread, 2 1/4" stringer 
@ Finishing Touches - www.ftstairs.com

Back


#4 railing style with standard #1 baluster - image Id maple8-6 - Finishing Touches -(stairs and railings images)
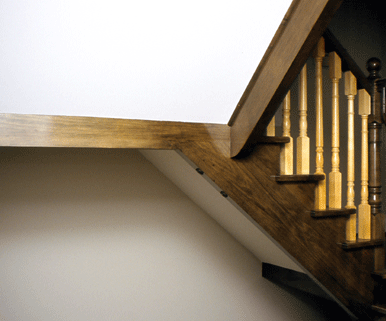
Manufufactured to form stringer and landing support
This image shows a close up of the way the stair stringer and landing support are manufactured as one unit and integrated into the stair itself. Notice the stringer from above being hung off the integrated support. This is also a good example of  a drywall finish under the stair. - if your browser supports the feature run your mouse around the image and important details will become visible about the item
Image id: maple8-6
Railing: #4
Balusters: turned 1 3/4" Standard #1
Posts: turned 3 1/2" Standard#1
Stairs: Straight C1S closed rise in maple 1 1/8" tread, 2 1/4" stringer 
@ Finishing Touches - www.ftstairs.com

Back


#4 railing style with standard #1 baluster - image Id maple8-7 - Finishing Touches -(stairs and railings images)
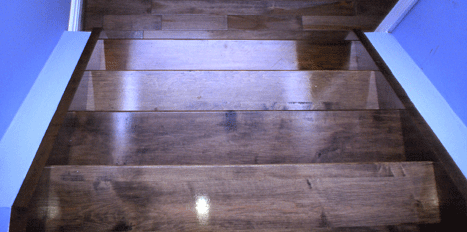
Stair between two walls illustrating a housed 2 side or closed both side stair case
This image illustrates a H2S (housed stringer both side) stair that is suitable for use between two walls. It is different from the C1S stringer configuration because you can see the stringer on the inside between each step. You can also see the top edge of the stringer running down the length of each side of the stair. No railing was require for this stair however one could put a wall railing down one or both of the sides. - if your browser supports the feature run your mouse around the image and important details will become visible about the item
Image id: maple8-7
Railing: #4
Balusters: turned 1 3/4" Standard #1
Posts: turned 3 1/2" Standard#1
Stairs: Straight C1S closed rise in maple 1 1/8" tread, 2 1/4" stringer 
@ Finishing Touches - www.ftstairs.com

Back

Back